
Make MacOS roam to the strongest wifi signal
After setting up a mesh network, the coverage in the house has been much better, but my Mac sometimes refuses to roam to a stronger signal. It happened this morning when I was sat next to one of the wifi nodes, but had no connection, so I knew something was up.
Helpfully, you can use the airport CLI to change your Mac’s roaming strategy.
Create an airport symbolic link
If you haven’t already, make a simple alias for airport like this in a terminal:
# Make a local bin folder if you haven't already
mkdir -p ~/bin
# Symlink ~/bin/airport to the actual airport command
ln -s /System/Library/PrivateFrameworks/Apple80211.framework/Versions/Current/Resources/airport ~/bin/
# Add ~/bin to your $PATH and add to your bash profile
echo "export PATH=$PATH:~/bin" >> ~/.bash_profile
# Finally, just run it, so you can call the airport alias
# in your current bash session
export PATH=$PATH:~/bin
# Now you can use the airport command, to e.g. scan for networks
airport -s
Use the airport command to change your wifi roaming strategy
Thanks to this Apple Stackexchange answer, I found out that you can tell your Mac to switch to the strongest signal:
sudo airport prefs joinMode=Strongest
You need the sudo, because you’re changing a system setting.
You can check it was set using:
airport prefs joinMode
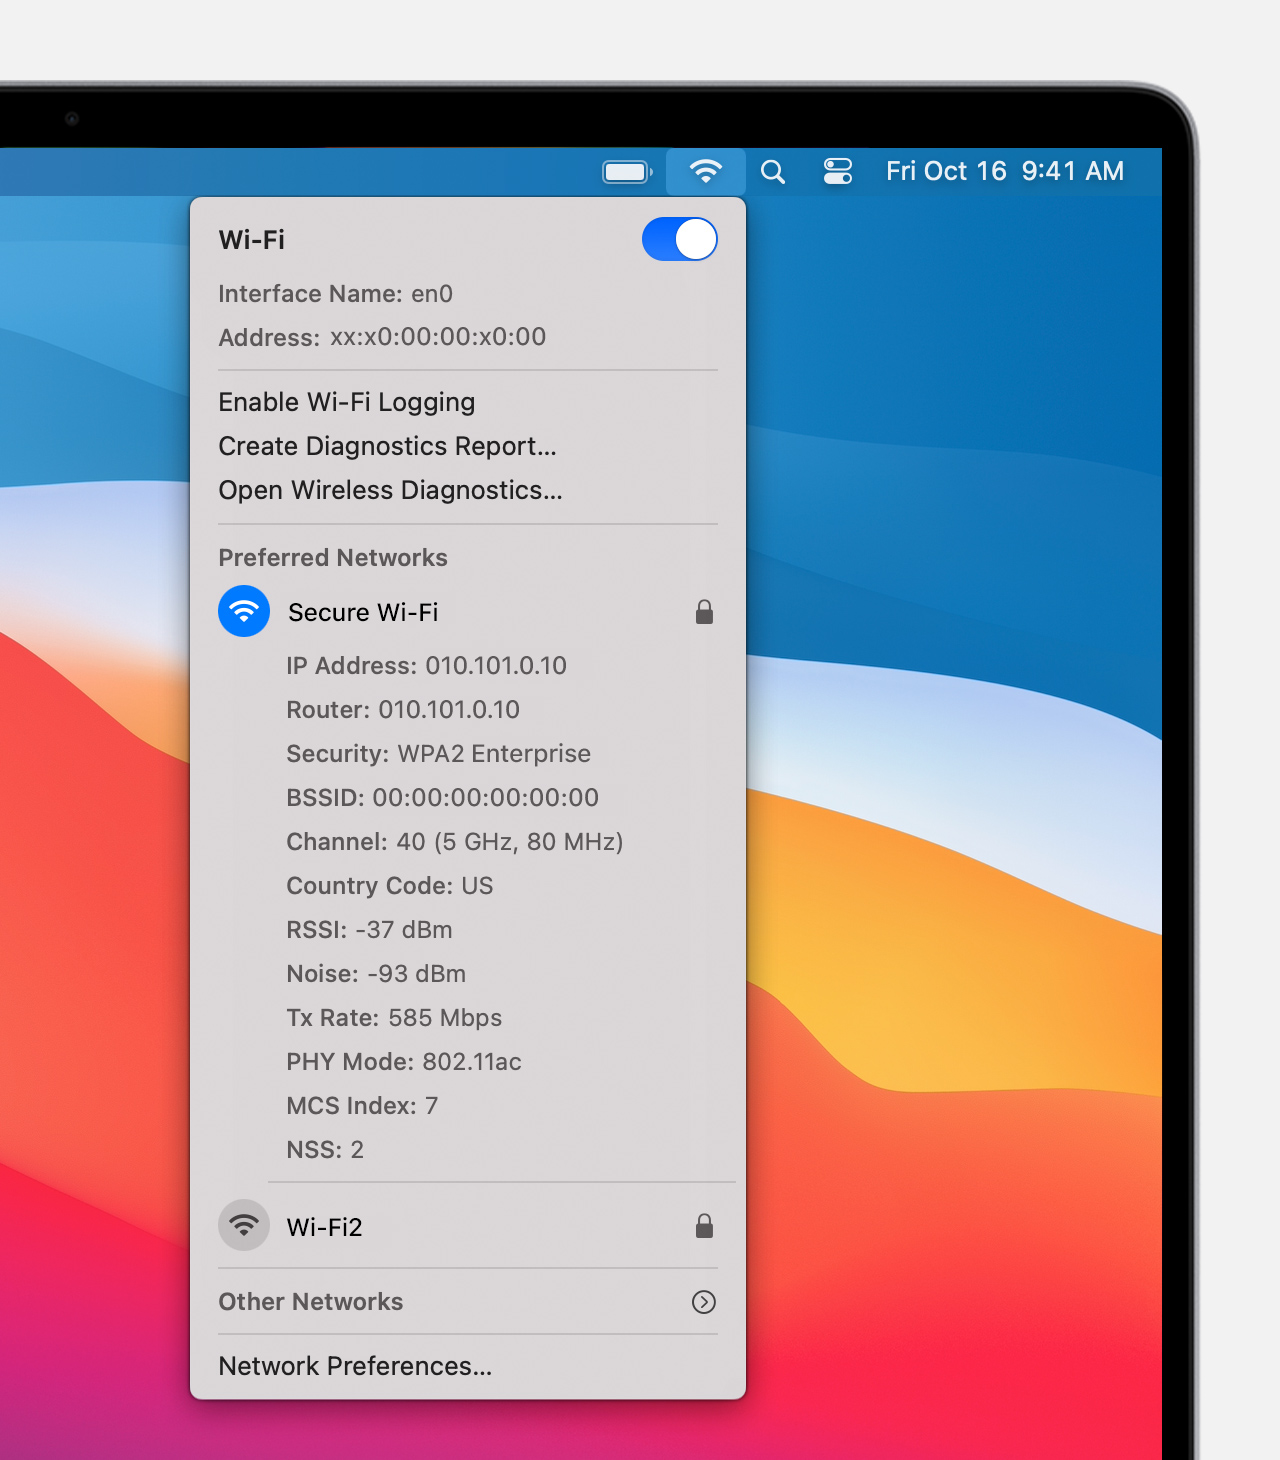
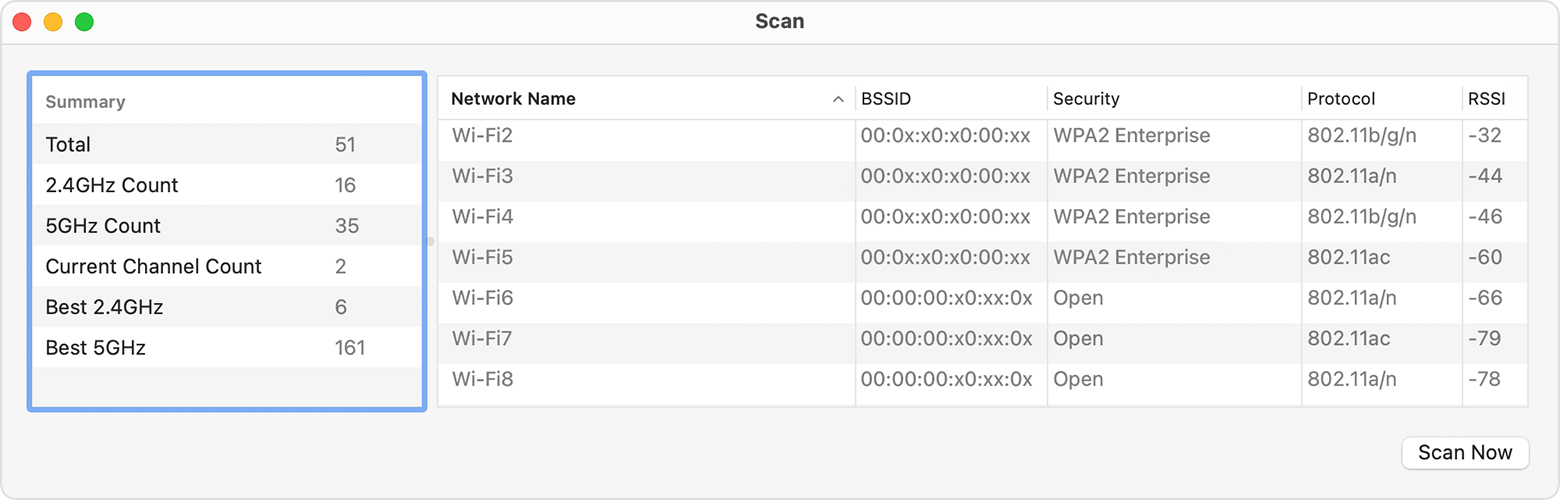
There’s also a nice GUI for checking what wifi networks are near you:
Option-click on the Wi-Fi menu, click Open Wireless Diagnostic, from the menu bar, click Window > Scan
Check wifi RSSI in iOS
Tim asked if it’s possible to do the same in iOS:
Nice one! Any idea how to get iOS to do this?
— 𝕋𝕚𝕞 𝕎 (@timwhitlock) January 14, 2021
I don’t think it is; it looks like it’s triggered by a drop in the RSSI
Looks like iOS will only switch once the RSSI (signal strength) drops below -70 dBm https://t.co/hzNQ5suCVz
— Jay (@jaygooby) January 14, 2021
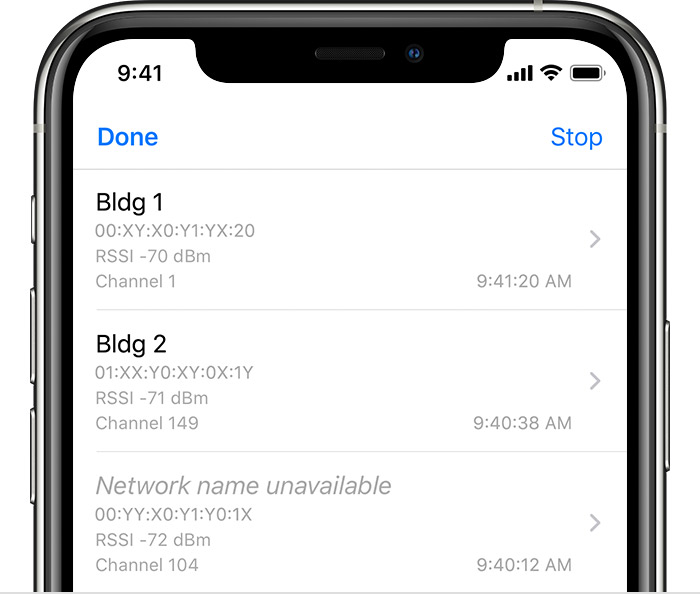
Apple have an Airport Utility app that you can use to scan wifi networks and check RSSI strength.
Once you’ve installed the app, you need to enable the wifi scanner in Settings: On your iPhone, iPad or iPod touch, go to Settings, tap AirPort Utility, then turn on Wi-Fi Scanner.
All links, in order of mention:
- setting up a mesh network: https://jay.gooby.org/2021/01/07/home-mesh-wifi
- terminal: https://support.apple.com/guide/terminal/welcome/mac
- this Apple Stackexchange answer: https://apple.stackexchange.com/a/144832/68933
- sudo: https://ss64.com/osx/sudo.html
- a nice GUI for checking what wifi networks: https://support.apple.com/en-us/HT206207
- January 14, 2021: https://twitter.com/timwhitlock/status/1349666391855652864?ref_src=twsrc%5Etfw
- https://t.co/hzNQ5suCVz
- January 14, 2021: https://twitter.com/jaygooby/status/1349669688737980417?ref_src=twsrc%5Etfw
- Airport Utility app: https://itunes.apple.com/gb/app/airport-utility/id427276530
- scan wifi networks and check RSSI strength: https://support.apple.com/en-gb/HT203068
Recent posts:
- Patch for aarch64 (aka arm64) openssl 1.0.2 'relocation R_AARCH64_PREL64 against symbol OPENSSL_armcap_P error'
- TIL: the `NO_COLOR` informal standard to suppress ANSI colour escape codes
- Copy the contents of a branch into an existing git branch without merging
- Adding search to a static Jekyll site using pagefind
- asdf, python and automatically enabling virtual envs